
What Is Ansible?
If you’re just starting out with IT automation, Ansible is one of the easiest and most powerful tools to learn. At its core, Ansible helps you manage and configure servers, applications, and networks by describing what you want them to look like – without needing to manually log in and type commands on each machine. It uses simple, human-readable YAML files called playbooks to define tasks, so even beginners can pick it up quickly. The beauty of Ansible is that it doesn’t require any special software on the machines you’re managing – it communicates over SSH – making it lightweight and hassle-free. Whether you’re automating repetitive tasks, deploying applications, or orchestrating complex IT environments, Ansible saves time, reduces errors, and gives you confidence that your systems are consistent and reliable.
Things You’ll Need To Try This
This howto guide is written based on my homelab environment. In my environment I have:
- Multi-vlan network (cisco)
- Dell PowerEdge R430 servers – running Ubuntu 20.04LTS
- Synology NAS – for network storage of VM disk images and configs over NFS
- libvirtd (KVM) hypervisor and guest tools installed:
apt install -y qemu qemu-kvm libvirt-daemon bridge-utils virt-manager virtinst nfs-client ansible ovmf libguestfs-tools - Modify
/etc/ansible/ansible.cfg:vim /etc/ansible/ansible.cfg
set:# uncomment this to disable SSH key host checking
host_key_checking = False - You’ll need a template guest VM installed and setup with SSH keys so ansible can clone and SSH into the clones to perform operations. (steps to build mentioned below)
Creating The Base Guest Image
The goal of creating the base guest, which will become the template used to create new cloned guests with Ansible is to setup a template guest which is minimally configured with just the bare essentials:
- SSH service installed
- create desired local accounts & set root password
- import hypervisor’s public ssh key to the template guest’s root account
- ensure python is installed on the template guest (needed by Ansible)
- install any desired packages that you may want/need for this template
- finally, shutdown the template guest in preparation for cloning
NOTE: in my example in this howto, the template guest is called ubuntu20.04-30G with a disk image file of ubuntu20.04-30G.qcow2. This will be the image I use to create clones. THE TEMPLATE GUEST SHOULD NEVER BE RUNNING WHEN CLONING!
Deploying New KVM Guests Using Ansible
Now that I’ve got the template guest created and setup the way I want, I need to also have a template netplan .yaml file so the playbook can create netplan configurations on the fly based on the build arguments. In my example, this is the netplan template I used:
# Netplan configuration generated by Ansible
network:
  version: 2
  ethernets:
    enp1s0:
      dhcp4: no
      addresses:
        - {{ vm_ip }}/{{ mask }}
      gateway4: {{ gw }}
      nameservers:
        addresses:
          - 10.0.1.15  # Change as desired
          - 10.0.1.16  # Change as desired
NOTE: Your mileage may vary and you can adjust the netplan template to suit your template guest’s actual interface names and nameserver addresses.
You can clone my github repo for this playbook example here: https://github.com/K1WIZ/deploykvm or just run: git clone https://github.com/K1WIZ/deploykvm.git in whatever directory suits you.
Once you have the template guest VM and playbook on your KVM hypervisor, you can now build some cloned guests with ease:
Run:ansible-playbook deploykvm.yaml --extra-vars "basename=lab vm_count=3 network_bridge=br10 vcpu=4 memory=4096 base_ip=10.9.9.210 mask=24 gw=10.9.9.1"
NOTE: The image to clone is hard coded in the deploykvm.yaml playbook. You can modify the playbook to make this a passed argument on the build line if you wish. It is set in the file as:
  vars:
    template_vm: "ubuntu20.04-30G"
    netplan_template: "netplan_template.yaml"
What this command does:
- sets the guest VM host names as the provided basename, ie. “lab”
- builds 3 clones
- sets the KVM network bridge interface for the guests (in my KVM environment, I have multiple vlans setup on different bridge interfaces)
- sets the number of CPU cores to allocate to the guests: 4
- sets the amount of RAM to assign to the guests: 4GB
- sets the starting IP address for the first guest: 10.9.9.210, and then assigns the next 2 addresses for the rest of the guests.
- sets the IP mask for the guests
- sets the IP gateway for the guests
When The Build Is Finished
NOTE:
When the cloning process runs, depending on the speed of your storage pool, it can take a few minutes to clone the disk images for each new guest – be patient!TASK [Clone the template VM]
When the build process completes, you’ll see Ansible print a summary of the actions after all the steps have completed:
PLAY RECAP *********
localhost                  : ok=22   changed=16   unreachable=0    failed=0    skipped=0    rescued=0    ignored=0
Looking at the build in depth:
ansible-playbook deploykvm.yaml --extra-vars "basename=lab vm_count=3 network_bridge=br10 vcpu=4 memory=4096 base_ip=10.9.9.210 mask=24 gw=10.9.9.1"

PLAY [Clone Ubuntu template VM] ********

TASK [Ensure base_ip, mask, and gw are defined] ********
ok: [localhost] => {
    "changed": false,
    "msg": "All assertions passed"
}

TASK [Generate custom netplan file for each VM] ********
changed: [localhost] => (item=1)
changed: [localhost] => (item=2)
changed: [localhost] => (item=3)

TASK [Clone the template VM] ********
changed: [localhost] => (item=1)
changed: [localhost] => (item=2)
changed: [localhost] => (item=3)

TASK [Update maximum vCPU for each cloned VM] ********
changed: [localhost] => (item=1)
changed: [localhost] => (item=2)
changed: [localhost] => (item=3)

TASK [Update memory ceiling for each cloned VM] ********
changed: [localhost] => (item=1)
changed: [localhost] => (item=2)
changed: [localhost] => (item=3)

TASK [Set current memory for each cloned VM] ********
changed: [localhost] => (item=1)
changed: [localhost] => (item=2)
changed: [localhost] => (item=3)

TASK [Set current vCPU for each cloned VM] ********
changed: [localhost] => (item=1)
changed: [localhost] => (item=2)
changed: [localhost] => (item=3)

TASK [Detach existing network interface for each cloned VM] ********
changed: [localhost] => (item=1)
changed: [localhost] => (item=2)
changed: [localhost] => (item=3)

TASK [Attach new network bridge to each cloned VM] ********
changed: [localhost] => (item=1)
changed: [localhost] => (item=2)
changed: [localhost] => (item=3)

TASK [Generate custom netplan file for each VM (re-render)] *******
ok: [localhost] => (item=1)
ok: [localhost] => (item=2)
ok: [localhost] => (item=3)

TASK [Remove any existing netplan files in /etc/netplan] ********
changed: [localhost] => (item=1)
changed: [localhost] => (item=2)
changed: [localhost] => (item=3)

TASK [Upload custom netplan configuration to each cloned VM] ********
changed: [localhost] => (item=1)
changed: [localhost] => (item=2)
changed: [localhost] => (item=3)

TASK [Generate SSH host keys on each VM] ********
changed: [localhost] => (item=1)
changed: [localhost] => (item=2)
changed: [localhost] => (item=3)

TASK [Start each cloned VM] ********
changed: [localhost] => (item=1)
changed: [localhost] => (item=2)
changed: [localhost] => (item=3)

TASK [Pause for 5 seconds before waiting for SSH] ********
Pausing for 5 seconds
(ctrl+C then 'C' = continue early, ctrl+C then 'A' = abort)
Pausing for 5 seconds
ok: [localhost] => (item=1)
(ctrl+C then 'C' = continue early, ctrl+C then 'A' = abort)
ok: [localhost] => (item=2)
Pausing for 5 seconds
(ctrl+C then 'C' = continue early, ctrl+C then 'A' = abort)
ok: [localhost] => (item=3)

TASK [Wait for SSH to become available on each cloned VM] ********
ok: [localhost] => (item=1)
ok: [localhost] => (item=2)
ok: [localhost] => (item=3)

TASK [Probe delegated host (delegated)] ********
ok: [localhost] => (item=1)
ok: [localhost] => (item=2)
ok: [localhost] => (item=3)

TASK [Set hostname for each cloned VM (delegated)] ********
changed: [localhost] => (item=1)
changed: [localhost] => (item=2)
changed: [localhost] => (item=3)

TASK [Ensure /etc/hostname contains the hostname (delegated)] ********
ok: [localhost] => (item=1)
ok: [localhost] => (item=2)
ok: [localhost] => (item=3)

TASK [Ensure /etc/hosts contains localhost and this host (delegated)] ********
changed: [localhost] => (item=1)
changed: [localhost] => (item=2)
changed: [localhost] => (item=3)

TASK [Reboot each cloned VM (delegated)] ********
changed: [localhost] => (item=1)
changed: [localhost] => (item=2)
changed: [localhost] => (item=3)

TASK [Clean up temporary netplan files] ********
changed: [localhost] => (item=1)
changed: [localhost] => (item=2)
changed: [localhost] => (item=3)
At this point, we now have 3 new KVM guests running, each with their own IP and hostnames. Otherwise, they are exactly configured as the template guest.
root@pkvm-r430-2:/vol1/kvmdk# virsh list
 Id   Name    State
-----------------------
 1    lab01   running
 2    lab02   running
 3    lab03   running

root@pkvm-r430-2:/vol1/kvmdk#
and we can see now we can SSH into these guests, and they all have the public key of the KVM hypervisor and won’t require a root password (if logging on from the KVM hypervisor):
root@pkvm-r430-2:/vol1/kvmdk# ssh [email protected]
Welcome to Ubuntu 20.04.6 LTS (GNU/Linux 5.4.0-216-generic x86_64)

 * Documentation:  https://help.ubuntu.com
 * Management:     https://landscape.canonical.com
 * Support:        https://ubuntu.com/pro

 System information as of Wed 27 Aug 2025 04:55:13 PM UTC

  System load:  0.16               Processes:               179
  Usage of /:   25.1% of 19.52GB   Users logged in:         0
  Memory usage: 6%                 IPv4 address for enp1s0: 10.9.9.210
  Swap usage:   0%

 * Ubuntu 20.04 LTS Focal Fossa has reached its end of standard support on 31 Ma

   For more details see:
   https://ubuntu.com/20-04

Expanded Security Maintenance for Infrastructure is not enabled.

0 updates can be applied immediately.

Enable ESM Infra to receive additional future security updates.
See https://ubuntu.com/esm or run: sudo pro status

New release '22.04.5 LTS' available.
Run 'do-release-upgrade' to upgrade to it.


Last login: Wed Aug 27 16:48:30 2025 from 10.0.1.14
root@lab01:~#
What If We Want To Deploy More Changes?
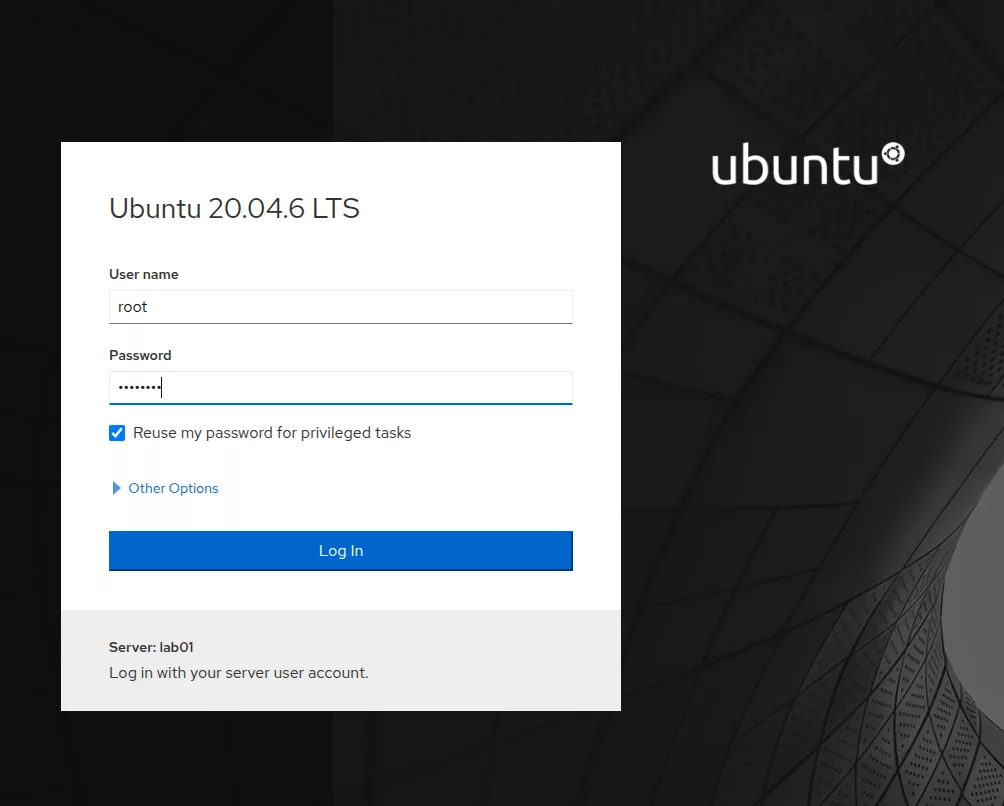
Say we want to deploy cockpit, a web UI management tool, to these new KVM guests, we can do so with ansible very easily. Here are the steps I followed:
- Create an inventory file for the new guests, you can name it whatever you want – just remember the name. It should look something like this (though your mileage will vary if you used different host names). My inventory file is called
labHosts.ini[lab]
10.9.9.210
10.9.9.211
10.9.9.212 - Run the installCockpit.yaml playbook and reference the labHosts.ini file:
ansible-playbook -i /etc/ansible/labHosts.ini installCockpit.yaml
ansible-playbook -i /etc/ansible/labHosts.ini installCockpit.yaml

PLAY [Install Cockpit on Ubuntu systems]

TASK [Gathering Facts]
ok: [10.9.9.210]
ok: [10.9.9.212]
ok: [10.9.9.211]

TASK [Ensure apt cache is updated]
changed: [10.9.9.210]
changed: [10.9.9.212]
changed: [10.9.9.211]

TASK [Install Cockpit package]
changed: [10.9.9.212]
changed: [10.9.9.211]
changed: [10.9.9.210]

TASK [Ensure Cockpit service is enabled and started]
changed: [10.9.9.212]
changed: [10.9.9.211]
changed: [10.9.9.210]

PLAY RECAP
10.9.9.210                 : ok=4    changed=3    unreachable=0    failed=0    skipped=0    rescued=0    ignored=0
10.9.9.211                 : ok=4    changed=3    unreachable=0    failed=0    skipped=0    rescued=0    ignored=0
10.9.9.212                 : ok=4    changed=3    unreachable=0    failed=0    skipped=0    rescued=0    ignored=0
We can now reach the cockpit webUI at the following address: https://10.9.9.210:9090
What If I Want To Get Rid Of These New KVM Guests?
If you’re spinning up temporary KVM guests that you don’t want to keep long term, I’ve written a handy cleanup script that will make it easy to clean up and remove these cloned guests. It is called cleanVm.sh and is in the github repo you cloned as part of this howto. Here’s what’s inside:
#!/bin/bash
#
# This script is a simple tool to rapidly destroy and cleanup KVM guest VMs.

if [ "$#" -ne 2 ]; then
  echo "Usage: $0 <basename> <serial_range>"
  echo "Example: $0 vmguest 01-07"
  exit 1
fi

BASENAME=$1
RANGE=$2
START=${RANGE%-*}
END=${RANGE#*-}

for i in $(seq -f "%02g" "$START" "$END"); do
  VM_NAME="${BASENAME}${i}"

  if virsh dominfo "$VM_NAME" > /dev/null 2>&1; then
    echo "Destroying and undefining $VM_NAME..."
    virsh destroy "$VM_NAME" 2>/dev/null
    virsh undefine "$VM_NAME" --remove-all-storage
    echo "$VM_NAME destroyed and storage removed."
  else
    echo "$VM_NAME does not exist."
  fi
done
to run, just set the execute bit: chmod +x cleanVm.sh and run:
./cleanVm.sh
Usage: ./cleanVm.sh <basename> <serial_range>
Example: ./cleanVm.sh vmguest 01-07
So:
root@pkvm-r430-2:/vol1/kvmdk# ./cleanVm.sh lab 01-03
Destroying and undefining lab01...
Domain lab01 destroyed

Domain lab01 has been undefined
Volume 'vda'(/var/lib/libvirt/images/lab01.qcow2) removed.

lab01 destroyed and storage removed.
Destroying and undefining lab02...
Domain lab02 destroyed

Domain lab02 has been undefined
Volume 'vda'(/var/lib/libvirt/images/lab02.qcow2) removed.

lab02 destroyed and storage removed.
Destroying and undefining lab03...
Domain lab03 destroyed

Domain lab03 has been undefined
Volume 'vda'(/var/lib/libvirt/images/lab03.qcow2) removed.

lab03 destroyed and storage removed.
You’ll note that all 3 cloned KVM guests are no longer present.

