I recently setup a wireless front door security camera to watch and notify of any visitors to our front porch. During the holidays, there’s a lot of package stealing being reported in the news. I am prepared! My home made system does the following:
- uses passive infrared (PIR) to detect motion within 30 feet
- sends a push notification of the detection to my smartphone via pushover
- records 2 minutes of 1080p video & converts it on the fly from H264 to .mp4
- uploads the .mp4 file over wifi to my NAS for safe keeping and later viewing
- sends another push notification when the .mp4 file is uploaded
- continues to watch for the next motion event to record
The camera and PIR sensor are mounted in a weatherproof enclosure and can be powered from any DC source from 7-35v. Here are some close up pictures. Click for larger image:


The logic:
- PIR motion event causes the sensor to send a 3v signal to GPIO pin 26 on the raspberry pi computer.
- When pin 26 goes high, it is read by the “detect” function and stored in a variable.
- The IF logic uses the variable for detection to either process video recording or return to the continuous loop.
- The continuous loop runs every second
How to setup:
- grab the latest copy of raspbian-jessie-lite image (no gui)
- burn jessie lite image to MicroSD card
- run raspi-config to set options (internationalisation, and turn the camera socket on if using a camera module – recommended)
- log in using raspbian default pi user and install necessary packages, update, & reboot the pi:
- sudo apt-get update
- sudo apt-get dist-upgrade
- sudo reboot
- sudo apt-get install rsync wiringpi gpac htop exfat-fuse exfat-utils
- insert a large capacity USB stick to cache video recording to & format it with exfat file system and mount to /video
- fdisk /dev/sda (change partition to type exfat)
- mkfs.exfat -n video /dev/sda1
- create /video directory
- edit /etc/fstab and set mount point for USB exfat key to /video (this ensures the USB is mounted on each boot) Your video files will process on the USB key before being uploaded by rsync (you need a NAS or server that can receive the incoming rsync stream).
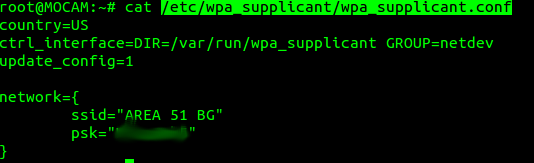
- setup wifi (/etc/wpa_supplicant/wpa_supplicant.conf)
The loop is a simple bash loop called by /etc/rc.local and runs whenever the unit is turned on:

The file containing the functions does all the heavy lifting:
