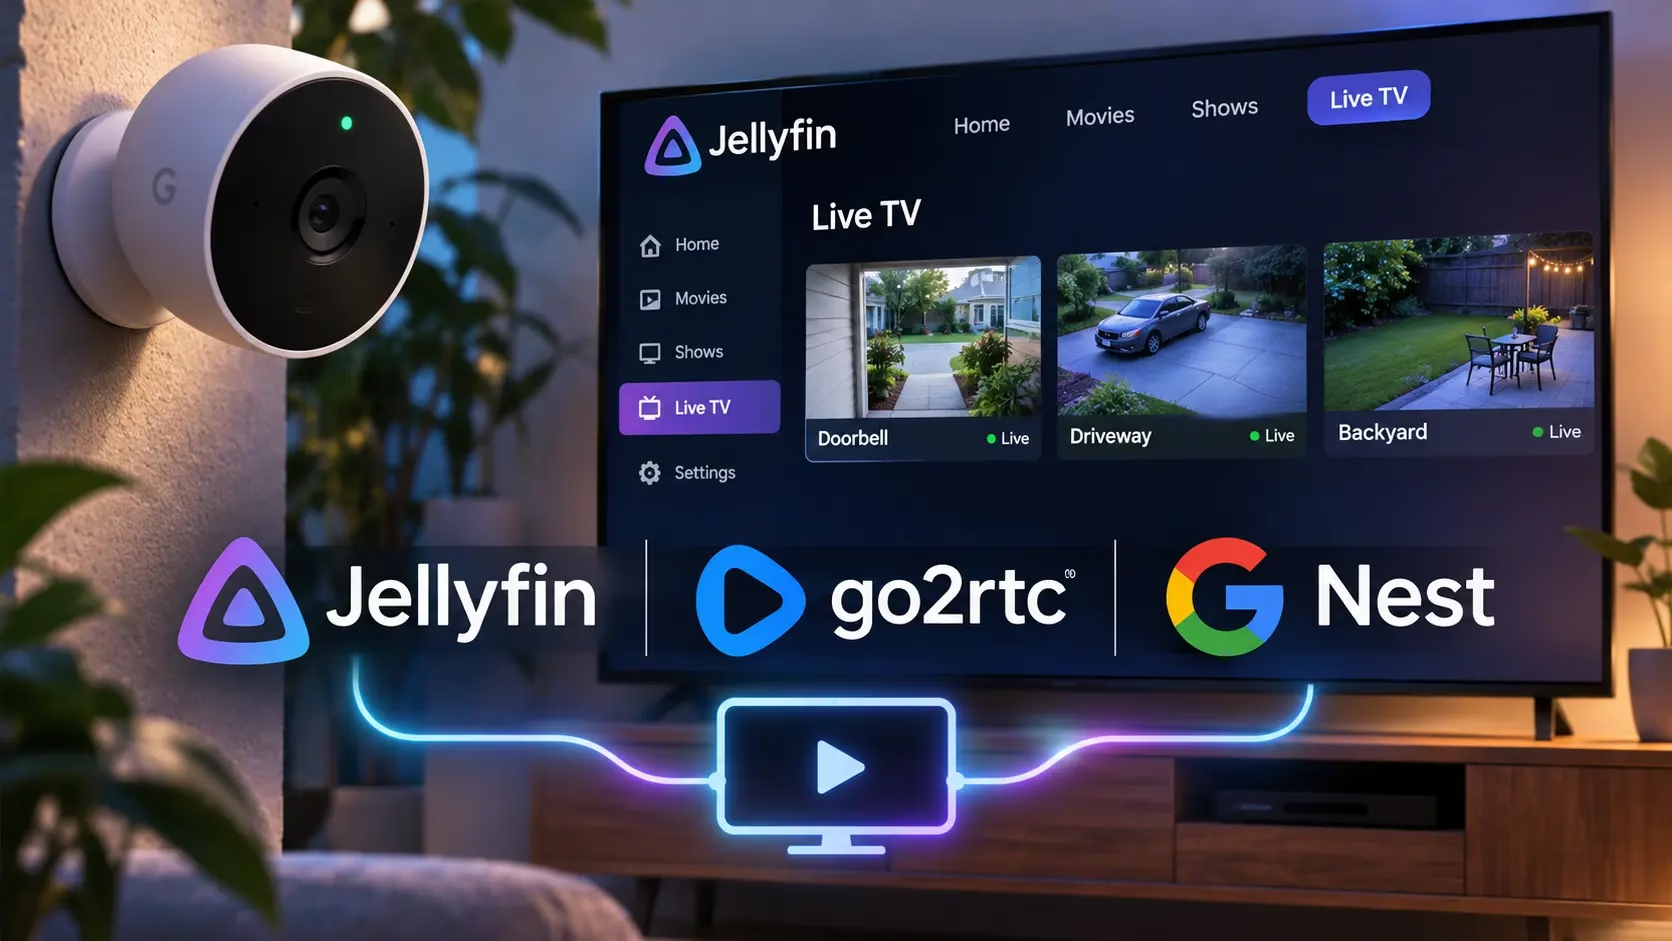
A homelab build log: direct Google access, Live TV channels, and the fixes that made the picture behave
I wanted to check my Nest cameras from the TV without reaching for my phone. Jellyfin was already there, so adding the cameras as Live TV channels seemed like a useful way to put the doorbell, driveway, and backyard on the same screen as the rest of my media.
The finished setup does exactly that. Getting there took more than adding a camera URL to a playlist. We worked through Google authorization, a go2rtc cold-start problem, Jellyfin’s stream probing, and a particularly odd issue where two cameras started normally and then showed only the upper-left portion of the image.
This is the account of what worked in my installation on November 9, 2026, including the parts I would check first if I were building it again.
The video path
The arrangement we ended up with was:
Nest cameras / Google cloud
           |
  Direct Nest WebRTC sessions
           |
         go2rtc
           |
  HTTP MP4 streams on the LAN
           |
  M3U playlist -> Jellyfin Live TV
           |
     Jellyfin app on the TV
Home Assistant is not in this video path. That was a deliberate choice: I wanted go2rtc to connect directly to Google. The go2rtc documentation describes a direct Nest source using Google credentials, even though it recommends Home Assistant for a simpler setup.[3]
My starting point was an existing Docker installation of go2rtc 1.9.15 with no camera streams configured. Its persistent configuration directory was mounted at /config, and FFmpeg was available inside the container. We started with the doorbell, then added the driveway and backyard.
The examples below use 192.168.2.47 in place of my private go2rtc address. Replace it with an address your Jellyfin server can reach. All Google IDs and credentials are placeholders. This is a build log for an existing container, not a clean-install Docker guide, and the custom build described below is an important part of the result.
Getting Google authorization right
Google’s setup involved two separate projects: a Google Cloud project for the Smart Device Management API and OAuth client, and a Device Access project linked to that client. The Device Access Project ID is distinct from the Cloud Project ID.[1]
We enabled the Smart Device Management API and created a Web application OAuth client. For the manual authorization flow, we used Google’s documented redirect URI:[1]
https://www.google.comThat detail caused our first failure: Error 400, redirect_uri_mismatch. The fix was to open the correct OAuth client in Google Cloud Console, add the exact redirect URI under Authorized redirect URIs, and save it. Putting it under JavaScript origins would not have fixed our configuration.
We then created the Device Access project and associated the OAuth client ID with it. We left events disabled for this initial viewing setup. Google’s getting-started guide also documents a one-time US$5 Device Access registration fee; check the guide before starting your own project.[1]
The account-linking step used Partner Connections Manager to grant the project access to the home and selected devices. The authorization request included offline access and consent so that the code exchange could return a refresh token. Google documents the code exchange and the initial devices.list request as part of completing authorization.[2]
I did not paste authorization codes or client secrets into the conversation. We used a local helper with hidden prompts to exchange the code and saved the resulting credentials in an owner-readable file with mode 0600. We then used the API to list devices and identify the doorbell. Its live-stream traits advertised H.264 video, Opus audio, and WEB_RTC.
For the direct source, we needed the OAuth client ID, client secret, refresh token, Device Access Project ID, and each camera’s device ID. Keep those values out of screenshots, blog examples, and Git repositories. The M3U playlist does not need them.
Giving go2rtc a direct Nest source
The direct Nest source format puts those values into a nest: URL.[3] This sanitized example shows the shape of our doorbell entry:
streams:
 nest-doorbell:
   - "nest:?client_id=CLIENT_ID&\
     client_secret=CLIENT_SECRET&\
     refresh_token=REFRESH_TOKEN&\
     project_id=DEVICE_ACCESS_PROJECT_ID&\
     device_id=DOORBELL_DEVICE_ID&protocols=WEB_RTC"
The backslashes above are YAML double-quoted line continuations. They keep the source URL on one logical line without adding spaces. Each value must be URL-encoded before it goes into the query string; our helper built the URL rather than relying on hand concatenation.
We backed up the existing configuration directory before writing the file and restricted access to the credential-bearing configuration. The file was /config/go2rtc.yaml inside the container. After restarting go2rtc, nest-doorbell appeared as a configured stream.
Listing a stream was only the beginning. We used ffprobe and FFmpeg to check whether it actually delivered video and audio. Once video was flowing, the doorbell reported 1600 × 1200 H.264 video and 48 kHz stereo Opus audio.
We later added nest-driveway and nest-backyard with their own device IDs. The stream names became the stable local names used throughout the rest of the setup.
The cold-start bug we could not solve with configuration alone
An early symptom was confusing: the first player could connect without receiving useful video, while a later player could work after the stream had warmed up. A connection and a successful API response were not enough to prove playback.
Our investigation of the installed 1.9.15 code found multiple H.264 choices in the Nest WebRTC offer. A consumer could bind to the receiver for one choice before Google’s actual video track arrived on a different negotiated payload. The later consumer could see the active track, which explained why warming the stream sometimes helped.
We built a narrowly scoped local fix. It restricted the Nest video transceiver to one registered H.264 codec before generating the offer, while preserving the audio and application/data-channel sections. The selected codec used packetization-mode=1 and profile-level-id=42e01f. We did not restrict codec choices globally for unrelated go2rtc sources.
This was a source change, not a go2rtc.yaml option. The local image was tagged:
local/go2rtc:1.9.15-nestfix1We tested in a separate container before touching production. The new offer regression test failed against the original offer construction and passed with the change. The Nest and WebRTC package tests passed, and all nine short cold-start camera decode tests completed. Some startup decoder warnings remained.
The full repository test suite was not entirely green. We reproduced the same failing packages in the unmodified baseline and found no additional failing packages in the patched tree. That is a narrower claim than saying every upstream test passed.
After deploying the local image, we ran two fresh RTSP tests and one HTTP MP4 test per camera. All nine production tests decoded video. We retained the original image and configuration for rollback.
If you reproduce this project, do not assume the stock 1.9.15 image includes our fix, or that this profile choice is right for every Nest camera. Check your version and test fresh sessions. Our local tag was not a published upstream release, and we configured the deployment not to pull over it automatically.
Adding the cameras to Jellyfin by hand
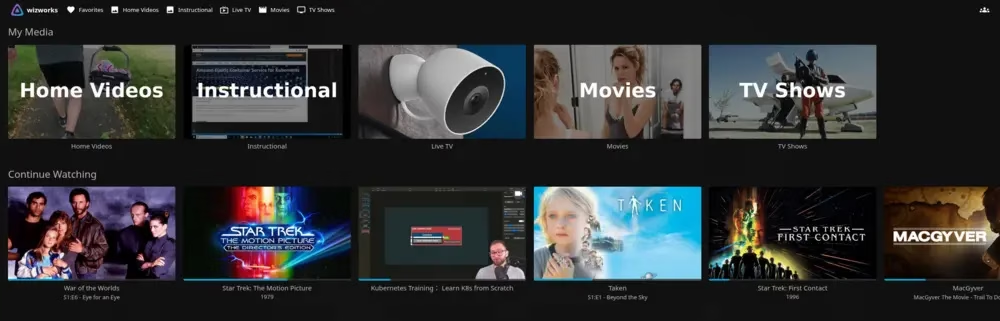
I wanted to make the Jellyfin changes manually. Jellyfin’s built-in M3U tuner was sufficient; the setup guide supports either a local playlist file or an HTTP playlist location.[5]
Our first playlist used go2rtc’s RTSP URLs. Those streams passed longer playback tests, but selecting the doorbell in Jellyfin produced a spinning blue circle.
Testing with Jellyfin’s own tools exposed the difference. With a short RTSP probe, the doorbell could appear as H.264 video with dimensions of 0 × 0. The HTTP MP4 endpoint returned usable 1600 × 1200 dimensions in the comparison test. We also verified that Jellyfin’s FFmpeg could process video and audio from that HTTP source.
We replaced the doorbell’s RTSP line with:
http://192.168.2.47:1984/api/stream.mp4?src=nest-doorbell&video=h264&audio=opusThe explicit audio=opus mattered in our tests: the bare MP4 URL did not retain the Nest audio track. After saving the playlist, refreshing the guide, and reopening playback, the doorbell worked. We changed the other two cameras to the same HTTP format next.
For a local playlist, the path must make sense to Jellyfin itself. In my Docker setup, a file in the directory mounted at /config can be referenced as /config/nest-cameras.m3u. A file that exists only on a desktop, or an unmounted host path, is not enough.
The manual steps were:
1. Put nest-cameras.m3u somewhere the Jellyfin server can read it.
2. Open the administrator Dashboard, then Live TV and Tuner Devices.
3. Add an M3U Tuner and enter the playlist’s container-side path in File or URL.
4. Save the tuner and let Refresh Guide complete.
5. Open Live TV, then Channels, and test Doorbell before moving on to the other cameras.
We did not configure a guide-data provider for these camera channels. After later playlist edits, I ran Refresh Guide again and stopped and reopened playback so the client would use the new source.
Why the driveway and backyard suddenly cropped
All three cameras were now playing. On the TV, though, the driveway and backyard initially showed the whole scene and then cropped to the upper-left corner after a few seconds. The doorbell did not do it.
Rather than changing the TV’s zoom setting, we sampled decoded frame dimensions over time. A single ffprobe stream summary would have missed the useful detail.
| Doorbell | 1600 × 1200 | 1600 × 1200 | No change in the sample |
| Driveway | 640 × 360 | 1920 × 1080 | About 5 seconds |
| Backyard | 640 × 360 | 1920 × 1080 | About 3 seconds |
Those timings came from one diagnostic run; they were not fixed startup guarantees. Later tests showed different transition times.
Jellyfin had initially identified the driveway and backyard at 640 × 360. Its NVIDIA hardware-transcoding commands included CUDA scaling without fixed output dimensions. That combination made the source resolution jump the likely trigger for the crop. We did not prove the exact internal decoder or rendering failure, so I would not describe this as a universal NVIDIA or TV-client bug.
The practical fix was to give Jellyfin a constant-size stream before it reached that part of the playback chain.
Normalizing only the cameras that needed it
We left the doorbell and all original sources alone. We added separate fixed-resolution aliases for the driveway and backyard. go2rtc supports FFmpeg sources, encoder templates, and width/height parameters, and starts its FFmpeg process when a stream is requested.[4]
This is the normalization portion of our production configuration. Merge it into the existing configuration; the three original Nest sources must remain under the same streams mapping. The loopback RTSP input uses the production listener on port 8554.
streams:
 # Keep nest-doorbell, nest-driveway, and nest-backyard here.
 nest-driveway-fixed:
   - "ffmpeg:rtsp://127.0.0.1:8554/nest-driveway\
     #video=h264#audio=aac#width=1920#height=1080#timeout=30"
 nest-backyard-fixed:
   - "ffmpeg:rtsp://127.0.0.1:8554/nest-backyard\
     #video=h264#audio=aac#width=1920#height=1080#timeout=30"

ffmpeg:
 h264: >-
   -c:v libx264 -threads:v 2 -g 60 -bf 0
   -preset ultrafast -tune zerolatency
   -profile:v main -level:v 4.1 -pix_fmt yuv420p
   -b:v 4M -maxrate 4M -bufsize 8M
The FFmpeg inputs above are inside the go2rtc container, so 127.0.0.1 is intentional. It is not the address Jellyfin uses. Also note that the h264 template is global to go2rtc FFmpeg sources requesting that encoder. Our configuration had no previous FFmpeg overrides; review any existing users before applying it elsewhere.
These aliases re-encode video in software to a constant 1920 × 1080 and convert audio to AAC. They do more work than simply forwarding H.264. During the first low-resolution frames, a 1080p output does not create extra camera detail; it just gives the downstream player a consistent frame size.
We tested the aliases separately, including fresh starts without another viewer warming the raw sources. The fixed outputs stayed at 1920 × 1080 through the source resolution changes. Both also reported AAC stereo audio. We repeated the checks after adding them to production.
Two simultaneous software encodes used roughly two to three CPU cores on our eight-core host during testing. That is a measurement from this machine, not a sizing promise. We kept the streams on demand instead of preloading them, and Jellyfin could still transcode again for its client.
The final playlist
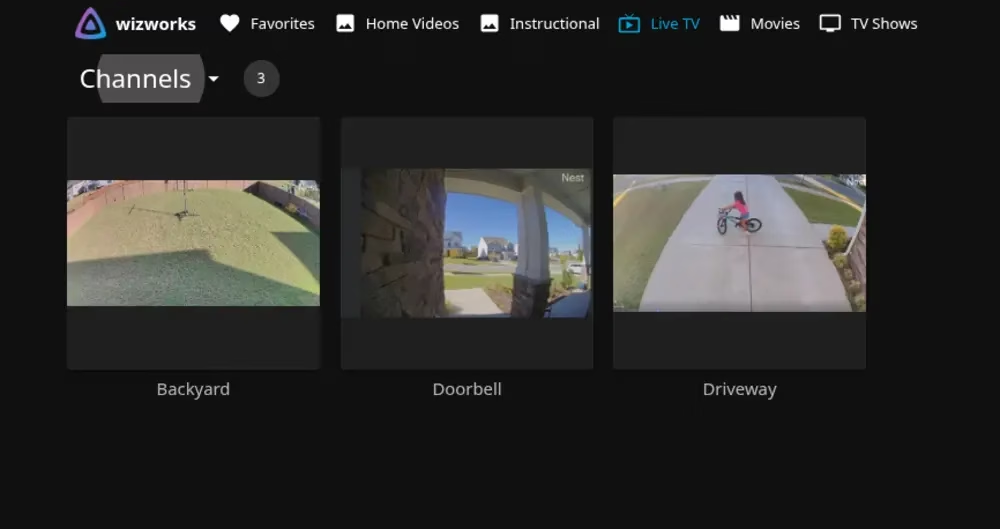
The final M3U uses the original doorbell stream and only the fixed aliases for the other two cameras:
#EXTM3U
#EXTINF:-1 tvg-id="nest-doorbell" tvg-name="Doorbell" group-title="Cameras",Doorbell
http://192.168.2.47:1984/api/stream.mp4?src=nest-doorbell&video=h264&audio=opus
#EXTINF:-1 tvg-id="nest-driveway" tvg-name="Driveway" group-title="Cameras",Driveway
http://192.168.2.47:1984/api/stream.mp4?src=nest-driveway-fixed&video=h264&audio=aac
#EXTINF:-1 tvg-id="nest-backyard" tvg-name="Backyard" group-title="Cameras",Backyard
http://192.168.2.47:1984/api/stream.mp4?src=nest-backyard-fixed&video=h264&audio=aac
Each HTTP address is one playlist line, even if an editor wraps it visually. The driveway and backyard keep their original channel IDs and names; only the source URLs change. This playlist contains no Google OAuth credentials.
After replacing those two URLs, refreshing the guide, and reopening the channels, I confirmed that the TV retained the full camera view. That was the final check that mattered for this project.
Checks I would keep for the next rebuild
I would test a cold source before opening any browser preview. Otherwise, an already-running viewer can hide a first-client problem. I would also run the probes from Jellyfin’s network context, preferably using the same FFmpeg installation it uses for playback.
For a bounded codec and dimension check of a fixed stream:
timeout 45 ffprobe -v error \
 -show_entries stream=codec_name,codec_type,width,height,sample_rate,channels \
 -of json \
 'http://192.168.2.47:1984/api/stream.mp4?src=nest-driveway-fixed&video=h264&audio=aac'
To investigate a size change, inspect frames rather than only the stream header:
timeout 60 ffprobe -v error -read_intervals '%+25' \
 -select_streams v:0 -show_frames \
 -show_entries frame=width,height,best_effort_timestamp_time \
 -of json \
 'http://192.168.2.47:1984/api/stream.mp4?src=nest-driveway&video=h264&audio=opus'
The first command should identify H.264 video at 1920 × 1080 and AAC audio for a fixed alias. The second produces frame metadata that can reveal changes during startup. A zero exit status alone is not the acceptance criterion: inspect the dimensions and confirm real playback with sound on the TV.
I would also keep backups of the credential-bearing configuration, the deployment definition, and the exact custom image. Restrict access to the backups as carefully as the live configuration. Avoid exposing go2rtc’s management and stream endpoints directly to the internet, and review which Jellyfin users can access Live TV before treating these channels as private.
There are limits to what we verified. The camera streams still depend on Google authorization and cloud availability. Our short decode tests and TV confirmation did not establish uninterrupted, hours-long multi-camera viewing or successful renewal across every session expiry. Long-running renewal remained a separate item to test, especially because the source review raised concerns about shared session state and extension timers in this version.
For the original goal, the result is useful: Doorbell, Driveway, and Backyard are now channels I can select with the TV remote. The most valuable lesson was to test the actual media at each boundary. Google authorization, a connected go2rtc source, usable Jellyfin metadata, and a correct picture on the TV were four different checks.
References and implementation notes
The build details, measurements, local patch description, and playback outcome above come from our November 9, 2026 implementation session. The numbered references document the public integration mechanisms; they do not independently validate our local patch or benchmark results. Private addresses, account identifiers, and credential values have been removed from the publication examples.
Official documentation
[1] Google Nest Device Access: Get started
[2] Google Nest Device Access: Authorize an account
[3] go2rtc v1.9.15: Nest source documentation

