For about $30USD you can build this network controlled internet radio player. I built this because it was dirt cheap and with the prices of raspberry pi boards still being much higher, for $30 you can’t go wrong with this project.

Preparing The Board & OS
I installed the Ubuntu (server, not desktop) image from the orangepi site. I used balena etcher to write the SD card. A 16GB SD card will be more than enough for this project. Once the OS is installed, you will need to perform the following steps:
Change the orangepi user default password, or create your own regular user account.
passwd <enter new password, then press ENTER>
confirm the password by entering it again as requested.
OR
sudo useradd -m <username>
sudo passwd <username>  (enter new password, & confirm)
sudo usermod -aG sudo <username>
sudo usermod -aG dialout <username>
sudo usermod -aG audio <username>
Once you do one of the above, now it’s time to install the needed packages & changes (be sure to connect the board to your network by wire or wifi FIRST!!!!):
sudo apt update
sudo apt install vlc apache2 php
sudo touch /opt/stations.csv
sudo chown www-data:www-data /opt/stations.csv
sudo chmod 666 /opt/stations.csv
sudo mkdir -p /etc/ntune && touch /etc/ntune/output.conf
sudo chown www-data:www-data /etc/ntune/output.conf
cd /var/www/html
sudo git clone https://github.com/K1WIZ/pi-internet-radio-player.git .
You will need to grant permissions to the web server running the PHP code to perform various functions. To do this, you will run the command: sudo visudo. When the file is opened for editing, you need to paste in this line:
www-data ALL = NOPASSWD: /usr/bin/killall,/usr/bin/amixer,/usr/bin/cvlc,/usr/sbin/runuser,/usr/bin/aplayNow press CTRL-O then CTRL-X to save the changes and exit the file.
This code assumes you are using a USB sound output device. UPDATE: new code has been added in /var/www/html/output.php to detect and select the desired output device. It is no longer necessary to hard-code or change the playback output as this can now be done from the web UI.
Finally, restart the webserver on the board:
sudo systemctl restart apache2Head Over To The Web UI
Now with all the above completed, you should be able to browse to the web UI at the URL of: http://ip.address
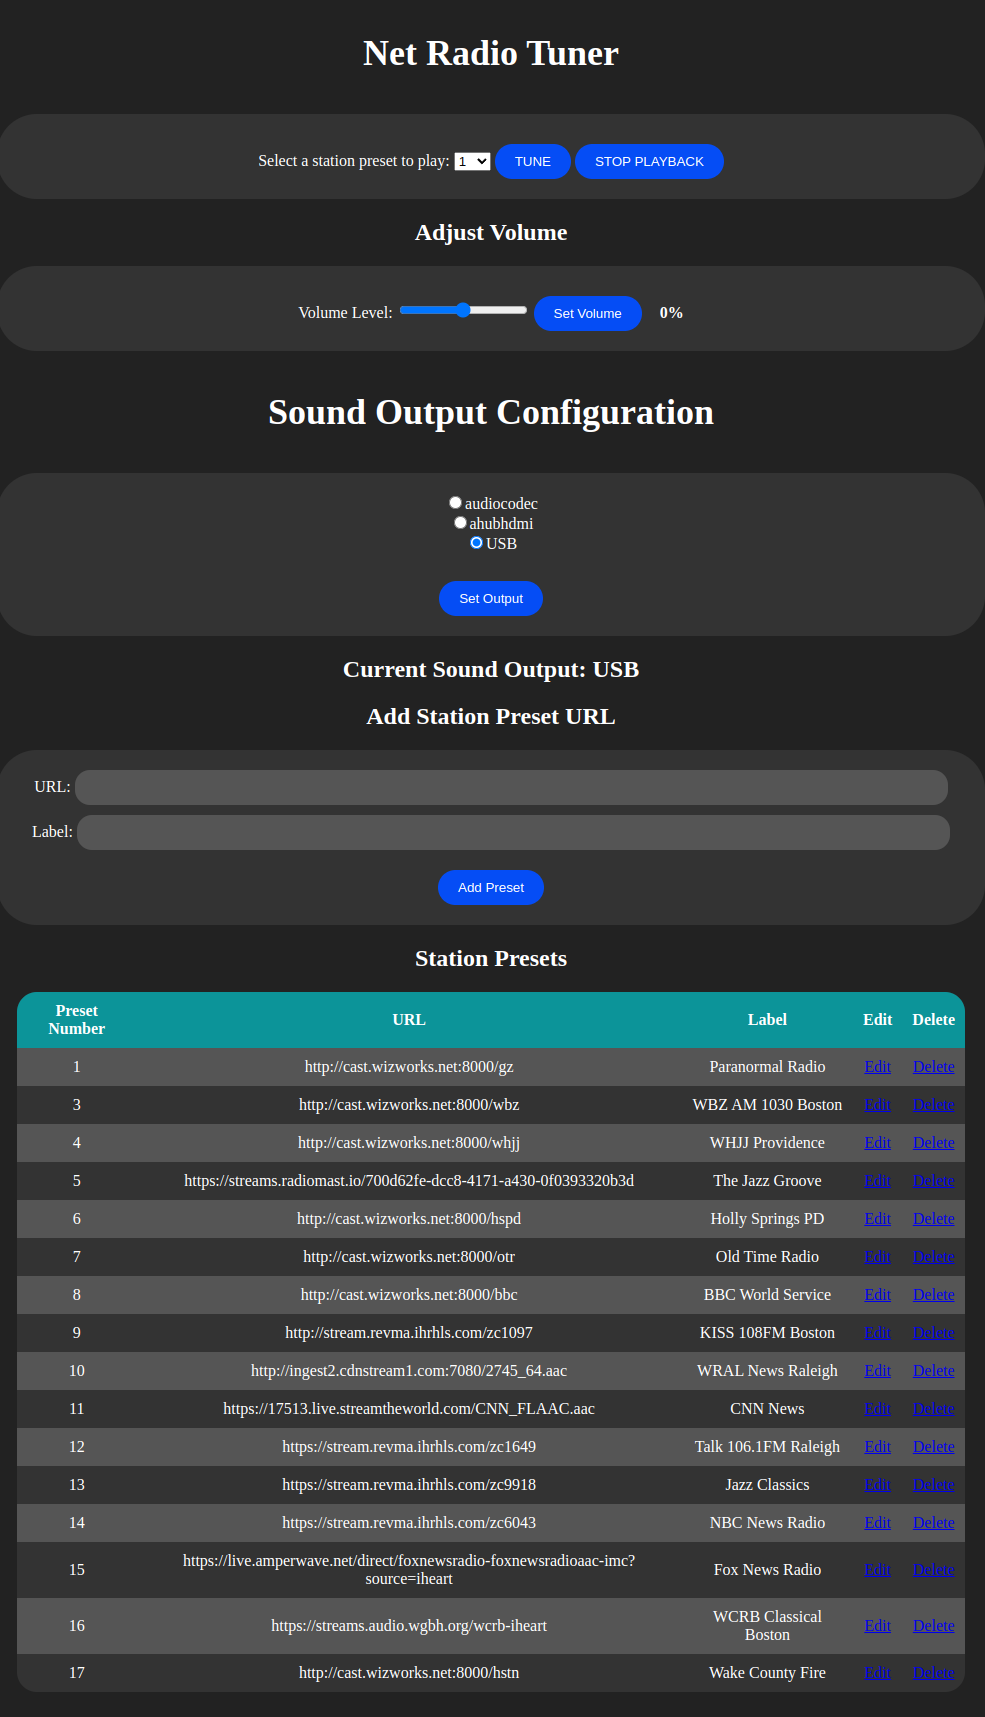
In this screenshot above, I have entered a few station presets, since your /opt/stations.csv will be empty, you will need to enter your favorite stream URLs into the web UI to begin playing streams.
Enjoy!
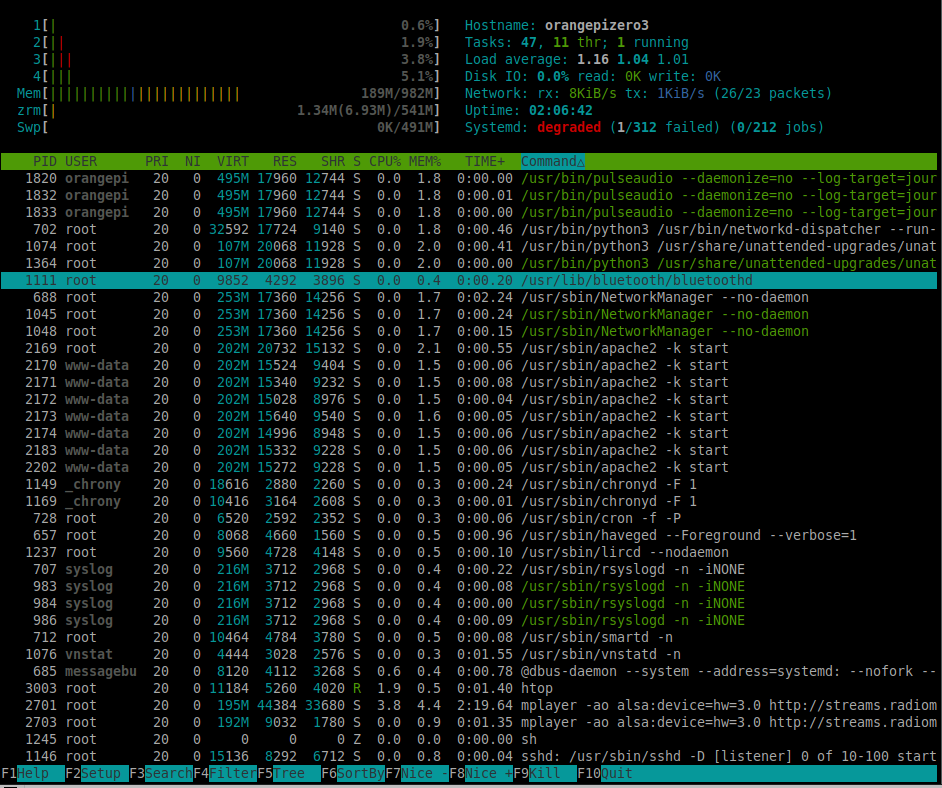
Performance
While playing a 128k AAC+ Jazz stream, this board doesn’t even break a sweat: