Sonoff: A Versatile WiFi Switch
I have been playing a lot with home automation technologies and the ESP82XX/arduino platform as hardware interfaces to my ever expanding control system. Most of the stuff I’m implemented has been Z-Wave, but though Z-Wave is an excellent technology, it is rather pricey to acquire. Since the ESP8266 & ESP8285 chips have started showing up in some finished electronics, it is now possible, now more than ever, to reprogram these devices with your own custom firmware!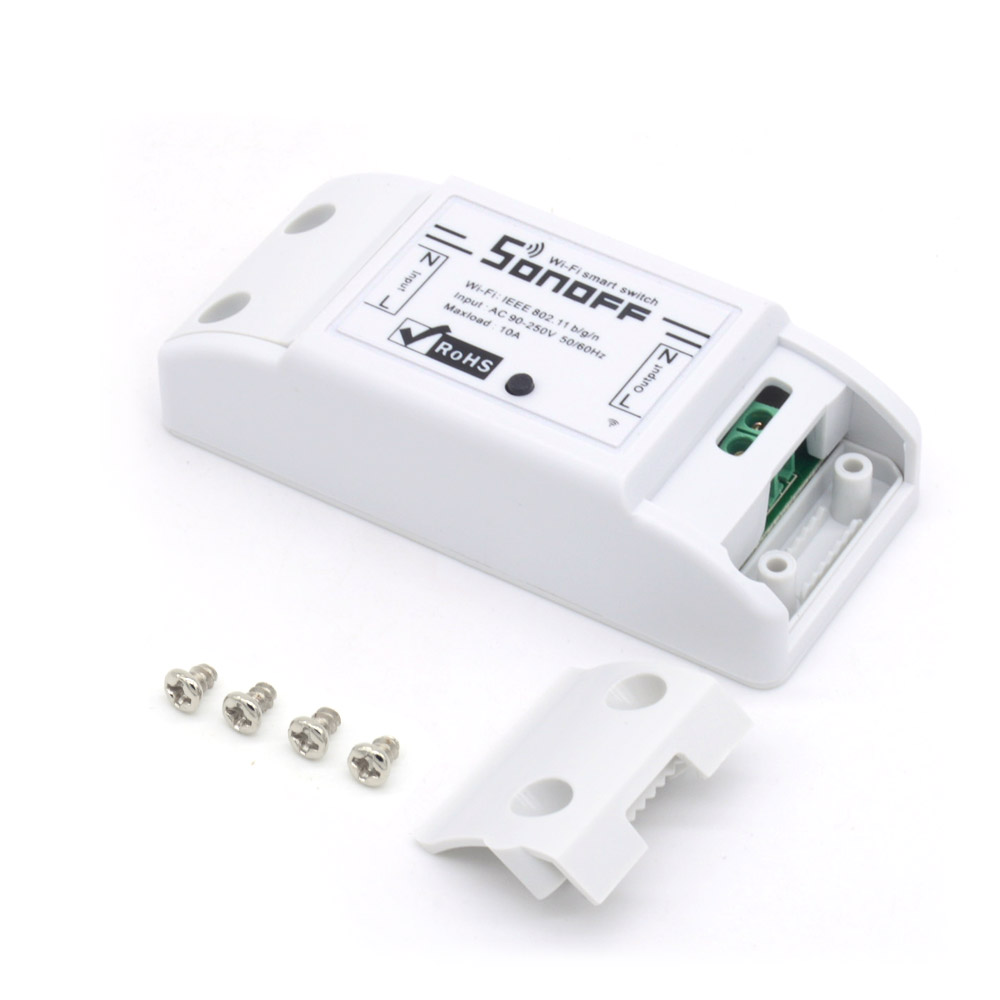
One such device is made by iTead Studio and is called Sonoff. Sonoff allows you to switch an AC load using your mobile device or PC from anywhere via their own cloud. In my home automation implementation, I want as little cloud involvement as possible – to minimize attack risk, and to keep other firms from data mining my habits at home. The only way to do that is to use technologies that allow local control and without cloud reliance. Unmodified, the Sonoff is an excellent device and generally available for $7 per unit. If you don’t mind sharing your usage data with iTead Studio or relying on their cloud infrastructure to operate your device, then there’s no need to modify it – just use it as prescribed.
For those who want total control and privacy, you can easily use 3rd party firmware or write your own! In my case, I wrote my own firmware which enables a simple HTTP interface which can be called by my Domoticz controller or manually. Since I have a VPN connection to my home on a DDNS hostname, I can easily and securely operate any devices from anywhere in the world with no need for an outside 3rd party, right from my mobile. To flash a custom firmware, you will need a few things:
- Sparkfun FTDI Basic 3.3v USB to Serial interface
- 5 pin header (to solder into the Sonoff unit)
- Arduino IDE software – to program the ESP8285 chip in the Sonoff
- Screwdriver
- Soldering Iron
- Custom Firmware of your choosing or your own
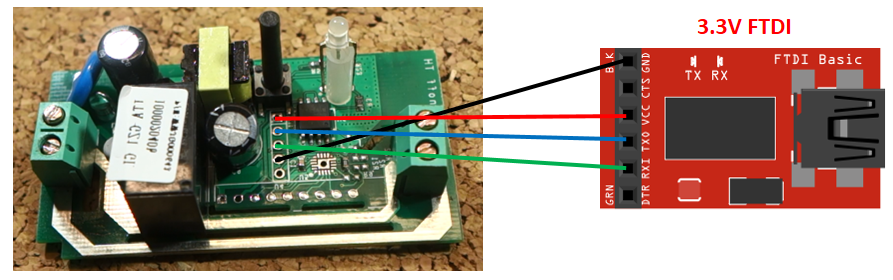
- Male to Female Dupont wires to wire the FTDI breakout to the header you’ll install (see diagrams)
*** WARNING *** WARNING *** WARNING ***
This project/information deals with MAINS CONNECTED equipment! You should NOT attempt to undertake anything described herein unless you are familiar with and confident with working with electricity and electrical safety! Risk of DEATH, FIRE, ELECTRIC SHOCK, and PROPERTY DAMAGE can result if you are attempt anything described here without being familiar with the concepts and safety herein. I will not be liable for your use of any of this information should you or someone else be killed or injured. I implore you to seek qualified and experienced help if you are unfamiliar with or unsure of anything described here. PLEASE BE SAFE!
Let’s Get Started!
First, you will CAREFULLY disassemble your Sonoff unit and remove the curcuit board inside. You will notice an unpopulated header where you will solder your 5 pin header to. This is the programming interface. (click for larger view)
Once you have soldered on the 5 pin header, you will now connect your FTDI serial breakout to your Sonoff: (Click for larger view)
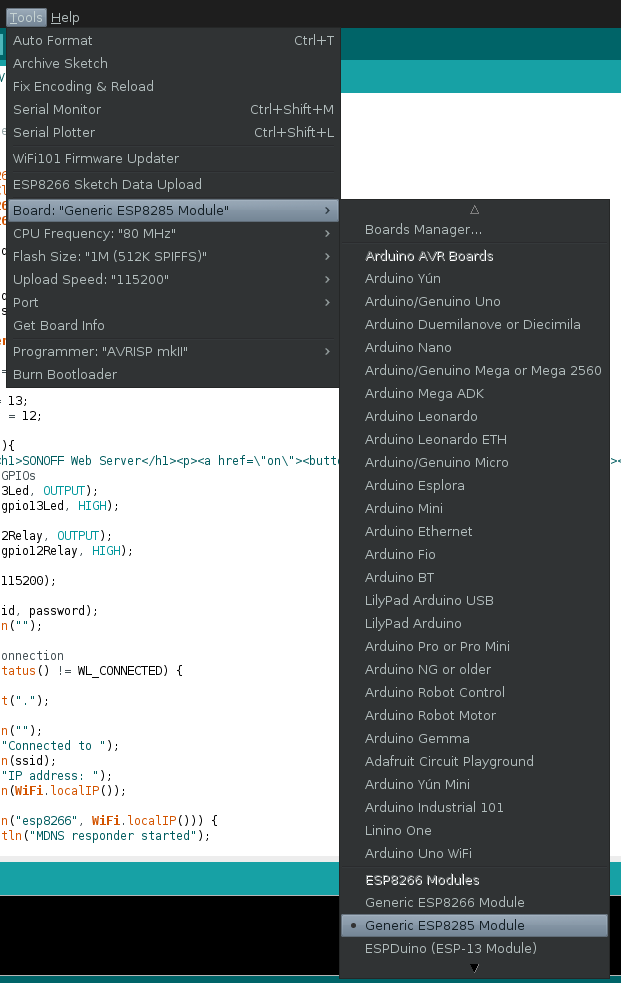
Once connected, now you will load your firmware into the IDE and choose the “Generic ESP8285” board and 1M size flash as shown: (click for larger view)
To flash: (NOTE: there is NO WAY to go back to stock firmware! this is a final operation!!!)
- Remove 3.3v lead
- Hold down button & reconnect 3.3v lead (at the same time)
- Release the button
- Flash your firmware
That’s it! Reassemble your Sonoff switch and your Sonoff should be ready to use!
Here’s my firmware. You are free to use/modify it. In my application I wanted the IP hardcoded, but you can easily change this to be DHCP. I’m currently (at the time of this writing) trying to figure out how to serve the HTTP interface from SPIFFS but not quite there yet so for now, it is hardcoded and functional.
Here’s how mine looks:
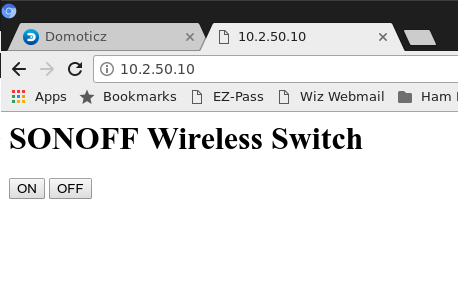
Very simple! You’ll notice that in my code, the switch responds to the URLs of /on and /off which makes it stupid simple to integrate with controllers like Domoticz, Wink, Smartthings, etc: (click for larger view)
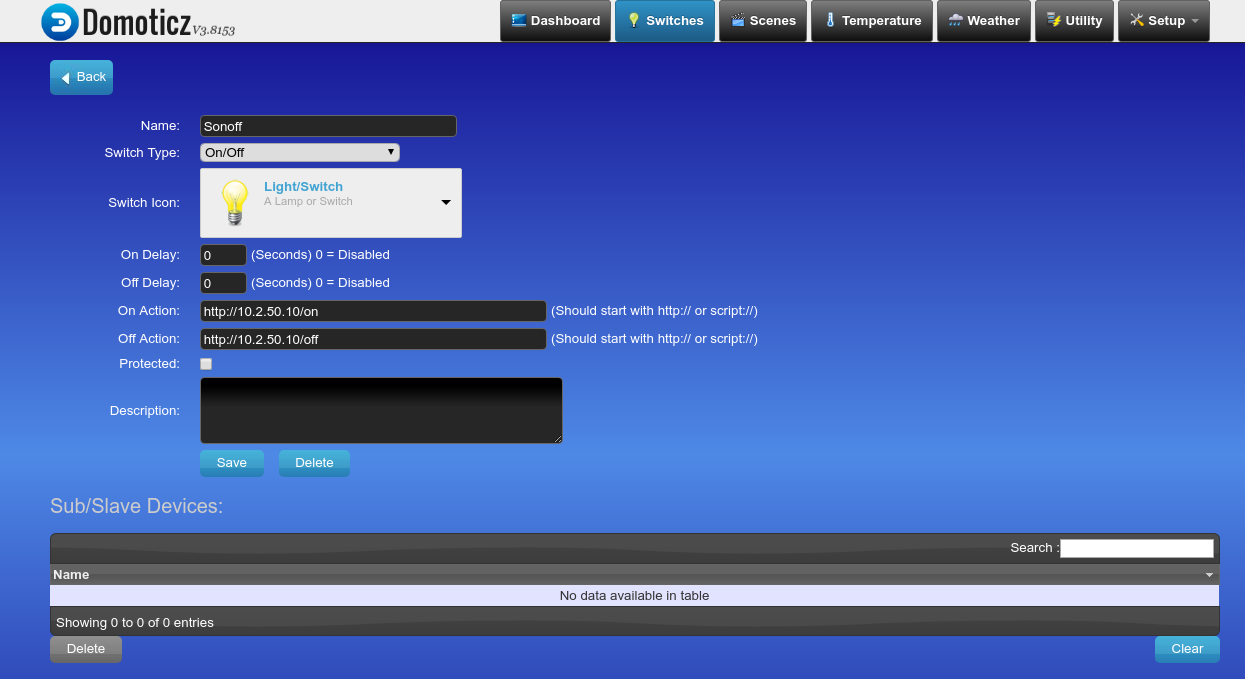
Once you configure this in your controller, you can then operate it as any other part of your system, and even with Amazon Echo (Alexa)!

Can you please email the code.
Iqnata to use it on Smartthings
Hey, I have ordered some sonoff plugs, do you think they will work with this firmware? It looks like exactly the thing I want so it would be awesome if it did. If the circuit in the sonoff basic and the plugs are different do you have any suggestions?
Hi there
Read your article “How to flash a non-cloud firmware” with great interest.
I am 55 year old, engineer but my electronic know-how is limited. Has recently bought Arduino and will play with it this summer.
I have also decided to buy the Fibaro 2 and learn the Z-wave.
I am looking for someone who can help me to either hack/program or make me decide which way to go.
The basis is that I want a module that consists of a soil moisture sensor together (optional) with a relay like
https://community.smartthings.com/t/soil-moisture-sensors-rachio-ifttt-smartthings/82098
or just a basic without relay.
The sensor should be able to connect to an app so I can see the moisture or it should be automatic and water the plants when threshold is below a certain value.
I already have the system with waterpump, timer, solar panel etc. but not the moisture gadget.
One approach is to use Arduino and connect it via Wifi and ???
Another is hacking some hardware to make it talk to the moist sensor and Fibaro.
Or maybe you have some idea???
I am situated in Sweden but have a house in Spain with plants eager to a solution.